Showing posts with label introduction to windows 10. Show all posts

Monday, June 3

Doomster Diving into Recycle Bin | Windows 10 Basics

Doomster Diving into Recycle Bin | Windows 10 Basics


Doomster Diving into Recycle Bin Windows 10 Basics


https://youtu.be/bO7w4NVcgTA


20010005e Doomster Diving into Recycle Bin | Windows 11 Basics


https://youtu.be/BgeDuJClkhY?si=epZlvIDxcM5JZG8n


#EducationFUN, #windowswindows, #tutorial, windows 10 for beginners


In this lecture we

Will talk about driving in recycling.

Bin i.e. Recycle Bin in some detail

When you see Computer Recycle Bin.

I don't have a window so only on this corner

The recycling bin is thus placed upside down.

And that's just one, no other guesses.

It's not possible, they have to bring it all.

In customization it means one, two, three, four.

Apart from the four icons there, there is also an Edge icon.

Recycle window when fresh.

It's a staple here in my kitchen.

Basically the point is that you can do anything.

When you delete it, it gets recycled.

For example, here we go

Create a new file at

The file contains the status you are viewing.

That his basket looks completely empty.

Right click on it and simple

You can delete it. You can delete it.

Now see this is new ws1 from ws1.

The version is ws1 and this is the difference from the old version.

You won't find options in this old one.

Cut copy paste into it like a computer.

I have shown the buttons separately like this.

If you want the old version in Surat

You can pay more for the show it's old.

That context menu is the right-click menu which

So I right click on it and I

If I delete it, it will appear in the recycle bin.

It seems to be full now, full, all right.

Likewise, I have mentioned another thing here.

Prepare and I red click on it.

I delete it, it means it's too late.

You double-click on an item to put it in the Recycle Bin.

You can see two items in it.

That's right, the order goes like this

It has the location written where it is from.

What date did she arrive and what size is she?

What is it etc. etc. and whatever.

Well, now we are talking about it.

First of all

Let me talk about deleting something

Done with anything you delete.

Right click on what you want to do.

And click on simple delete icon.

If you are on an older version, click here.

A similar delete option appears.

With a click, whatever's yours is yours.

Moves to dust bin i.e. recycle bin.

Now here I have deleted the accessed file.

If I want to bring it back

Go inside the Recycle Bin and click on the file.

Click and here is the restore button.

Now if you know where it is from.

If it has come, you can go there.

That it is returned I give it the file name.

It's my duty to tell the school, it's okay.

Yes, this is the school name file.

We were deleting and restoring.

The first method I explained is when you

If you delete it, it goes to the recycle bin.

It happens when you click on it.

If yes, then restores.

If you do, it snaps back into place.

Another way is when you delete it.

Now you just delete, you delete.

You can also easily delete with the button.

Press it and it will be moved to the recycle bin.

Will you take control to bring her back?

If you do this, it will come back under control i.e.

The last will return null.

Then there is another way you can do it.

If you just delete you will get free space.

Right-click here and Any also comes.

If there is a problem with the shirt, come back and file.

After that it will be fine if you

It has been deleted and is in yours recycle bin.

There are many types of items and you

Want to sort it chronologically i.e.

The latest item you see in the last.

I deleted it, it's too long now.

The list contains the things you want to see.

Which I have recently deleted so that you date.

Click on modified to view the latest content.

She'll come up, that way you'll know.

Do you know what day I have today?

If you've deleted items in yours recycle bin.

There are thousands of things so you can make a short history like this.

We can do the same according to size.

You can also reduce the size by clicking once.

Do accordingly and great things will come up.

The second click is the smallest thing.

It will come later if we

If you want to make things permanent, here

I deleted it and recycled it.

If it has arrived, you can also root it here.

can delete

This message came here because you asked

If you want permanent residence, it is here.

This will also solve this problem.

Permanent deletion is the next thing if you

If you want to delete all items permanently.

You just click on it and become MT Risk.

Click on and if yes then you absolutely

will be empty

The next thing that happens after that is that we

By looking there are two types.

Recycling Bin Two forms of MT recycling.

bin and another when you put something in it.

Put it looks full then its

The icon is of two forms, one

There is MT and there is Phil.

And thirdly if you fall within it and

You see here that this is your file.

Its name, it's location, it's history.

This is its size, this is its item type and this

Its history has been edited, Here's one thing

Please clear the recycle bin.

This is not an app specification.

Does not keep app info or recycle bin.

This is the last time in Notepad Plus Plus.

Was it opened or just opened in Word?

He deleted and saved this file here.

Whatever the name is and the show is well done in front of you.

The next thing that happens is the recycle bin

The question arises that in recycling

The answer is how many things can come.

The recycling bin closes at 5pm and yours closes at 5pm.

Drive

Size is the size of your drive.

Can do at 5

The Recycle Bin is available by default.

That is, when a new window appears from the comp set.

Let's do 5. What is your desire?

C drive size is 100.

If you have a GB, you will get 5G if you recycle it.

If B is on 5

Whatever you say, Allah is your mercy.

If the drive size is 70 GB, how much for 5 GB?

So to get it out to 5, I put one on y.

Let me also show you a little calculation.

If 75 is 100, then it is 3.75 g, which is

This means the total is 100 x 5.

3.75 3.75 GB built on 5

Is it even possible to write matter on the 5th drive?

How can it be known then?

The boy doesn't like it, now here likes it.

Another question arises if so

The item should come up which is on your 5 i.e. your drive

What does it mean if it is greater than a size 5?

I am deleting whatever 10GB is.

So what do you think about recycling?

If it goes into the bin, the answer is yes

It won't go away when you want to delete it.

Then it will give the error that there is not enough space.

You haven't given enough space to the recycling bin.

It will be deleted directly if we whenever

Delete with the Del symbol.

be deleted directly.

Go ahead, the next thing is if we date.

Delete something if we want.

It doesn't go into the recycling bin first.

I'm going to empty it and now I'm going to create a new one here.

Item is one, I make new things.

I'm the text, I want it direct.

If it is deleted it does not go to the recycle bin.

Right-click on it and press Shift.

Keep it and press delete button and if yes

You'll notice that it won't go into the recycling bin.

If MT is MT, then done.

Permanently delete something

Method After that the next thing is that I

How can I increase or decrease its size?

If I am, for him to go into his property.

You can check the recycle bin drive size here.

But check out these custom sizes here

It is written

9547 OK so you know it's in MBz.

You can even extend it, I mean.

I can also do 18000, it becomes 18 pockets.

That's right according to AB, so you

Well if you increase it.

What is it called that makes it so big?

Which of these two will visit?

If you use size, I'm saying size C.

I should do this much, size D should be this much, that's fine.

Yes, then there is a 'do not' option at the bottom.

Move the file to the Recycle Bin without removing the file.

Not immediately deleted, it proves.

That every time I hit the delete button.

Do not take recycling but take it directly.

Delete things if you don't care about them.

Go to the computer where the problem is.

Deletes objects but they are recycled.

I don't go, nobody goes, so this and that

An error has occurred and this option is disabled.

This option is checked in the property.

Oval is disabled.

If you delete anything and

Directly, the other should proceed without asking.

Display the delete confirmation dialog when we

We verify anything.

If you delete, a confirmation dialog will appear.

Now he is not coming as usual which is ours.

The window contains a confirmation dialog.

I don't know, you click and delete.

The item is deleted without you asking.

If you want to enable this authentication.

If so, please fix this option here.

Well, now you can delete anything.

If you do, he will confirm it with you.

To delete it

No ok so this option is out of date.

Windows already had a check but

This option is available after Windows 10.

Inactive means delete the object and

Goes directly into recycling minutes.

Yes, the second thing is if you go to My Computer.

Come on and plug in a USB or something.

If you want to delete something, you delete it.

If deleted, enter.

You note that the item will not go into it and

Also many items will be deleted directly.

The location is such that the network

There is location, there is network.

This network allows you to transfer any file across the network.

See, you delete it after viewing it.

If we put other things in recycling

Will not go and cannot go back

That means you can't do it

I have explained many examples to you.

Let me repeat that first

The method of deletion means deletion

I told you the way after that

Set the sort date in Recycle.

We also sort dates into the recycling bin.

can do

Okay then come on

I taught you this task for 5

Nothing is found after that

So any portable after that

If Chi is deleted from something, it is its backup.

More does not lecture with us

If you have any questions, please let us know in the comments.


Saturday, June 1

Jazzing up the Desktop Background | Windows 10 basics


JAZZING UP THE DESKTOP BACKGROUND | WINDOWS 10 BASICS

windows


Jazzing up the Desktop Background  Windows 10 basics


https://youtu.be/_sOk2GHXhIw


20010005d Jazzing up the Desktop Background - windows 11 tutorials for beginners in Hindi


https://youtu.be/3bBbfEhlHW8?si=6attrsUK-mfYnwLF


#Education FUN, #windows, #tutorial, windows 10 for beginners


In this lecture we

Let's talk about the desktop.

Background means what is on the desktop.

The background is different from changing it.

If we talk about methods, then number one is.

Let's talk about the desktop.

The background is about to change.

So first we start with the menu.

Here you click on start menu.

Type settings and enter it.

After entering the settings, you can search here.

If you personalize it will appear like this.

Personalization is done.

Click on it and then Background

Click on it after your background.

This is a personalized background image.

So these different types of pictures are in front of you.

You can change any of these images.

Even if you just click on it, now you

After it appears on your desktop, see

If the same image is already in the background.

Here's how to change the picture on your desktop.

That's it, we changed the number from here.

You have to fit it from both sides.

Drag the center of the tile so that it fits the most and

This stretch is fine and both are fine.

Stay fit and stay healthy

So the next thing we will discuss.

You will be new after start menu.

How do I apply a background?

What does it come in order for?

Then you can search here for free.

Windows

Will also write more background wallpapers.

Wallpaper well it is in front of you with these images.

Come in, you'll see the full list.

The muscles will go, I want to put it on, so we

What is this click?

By clicking on it you can visit his website.

If you are free you can see it.

It was the only goal I could achieve.

I clicked download and that's what I'm saying.

Sir please join, by the way he has downloaded it too.

If we do it, we will see it unfold.

As we go, this is what we see in the background.

I went here to organize my desktop.

Method number one is the first right click.

After right clicking you will see here.

The desktop background option is set as default.

Background: Click on it and you will see there.

If you go to desktop, you will see it.

You are second in the background.

Browse photos from where you came from.

Can and tell him.

The folder contains the images we want to add.

That's right, you can browse and give location.

If it is there, the same folder will be installed as is.

I did this using right click.

The next thing that happens after the work is done.

If we have a desktop.

If you don't post a picture, you have to pay for it.

Instead of an image you just worked with color.

I have to admit; a lot of people don't like the picture.

All he has to do is use color.

So why are you here?

See I have put the image in solid color.

If it comes, the color of the face that will appear in front of you.

Click on one and you will color.

You can go to the desktop and go to the desktop.

We check here if the color is done.

kaya new rear kid and new solid

the color

By applying any color and then we

background set from

Internet wallpaper we got too

See, that's right, so we have a solid color.

I also applied and watched today's lecture.

I saw New from the Start menu

How to apply background

Which ones are there to fit it on the screen?

Option C is that you can do this.

Can fit can extend

And after that you can download background from internet.

How to download and install it and

If you don't set background, then solid

How to Apply Color More Videos?


ڈیسک ٹاپ کے پس منظر کو جاز کرنا  |  ونڈوز 10 کی بنیادی باتیں


Jazzing up the Desktop Background  Windows 10 basics


https://youtu.be/_sOk2GHXhIw


20010005d Jazzing up the Desktop Background - windows 11 tutorials for beginners in Hindi


https://youtu.be/3bBbfEhlHW8?si=6attrsUK-mfYnwLF


#Education FUN, #windows, #tutorial, windows 10 for beginners


اس لیکچر میں ہم

ڈیسک ٹاپ کے بارے میں بات کریں گے۔

پس منظر یعنی جو ڈیسک ٹاپ پر ہے۔

پس منظر اسے تبدیل کرنے سے مختلف ہے۔

اگر ہم طریقوں کی بات کریں تو پہلا نمبر ہے۔

آئیے ڈیسک ٹاپ کے بارے میں بات کرتے ہیں۔

پس منظر بدلنے والا ہے۔

تو سب سے پہلے ہم مینو سے شروع کرتے ہیں۔

یہاں آپ اسٹارٹ مینو پر کلک کریں۔

ترتیبات ٹائپ کریں اور اس میں داخل ہوں۔

سیٹنگز میں آنے کے بعد آپ یہاں سرچ کریں۔

اگر آپ ذاتی بناتے ہیں تو یہ اس طرح ظاہر ہوگا۔

پرسنلائزیشن ہو گئی ہے۔

اس پر کلک کریں اور پھر بیک گراؤنڈ

اپنے پس منظر کے بعد اس پر کلک کریں۔

یہ ایک ذاتی نوعیت کی پس منظر کی تصویر ہے۔

تو یہ مختلف قسم کی تصویریں آپ کے سامنے ہیں۔

آپ ان تصویروں میں سے کسی کو بھی بدل سکتے ہیں۔

یہاں تک کہ اگر آپ صرف اس پر کلک کریں، اب آپ

یہ آپ کے ڈیسک ٹاپ پر ظاہر ہونے کے بعد، دیکھیں

اگر وہی تصویر پہلے سے ہی پس منظر میں ہے۔

اپنے ڈیسک ٹاپ پر تصویر کو تبدیل کرنے کا طریقہ یہ ہے۔

یہ ہو گیا، ہم نے یہاں سے نمبر بدل دیا۔

آپ کو اسے دو طرف سے فٹ کرنا ہوگا۔

ٹائل کے مرکز کو کھینچیں تاکہ یہ سب سے زیادہ فٹ ہوجائے اور

یہ اسٹریچ ٹھیک ہے اور دونوں ٹھیک ہیں۔

فٹ رہیں اور صحت مند رہیں

تو اگلی چیز جس پر ہم بحث کریں گے۔

آپ اسٹارٹ مین کے بعد نئے ہوں گے۔

میں پس منظر کا اطلاق کیسے کر سکتا ہوں؟

یہ اس کے لئے کیا ہے ترتیب میں آتا ہے؟

اس کے بعد آپ یہاں مفت میں تلاش کر سکتے ہیں۔

ونڈوز

مزید بیک گراؤنڈ وال پیپر بھی لکھیں گے۔

وال پیپر ٹھیک ہے یہ ان تصاویر کے ساتھ آپ کے سامنے ہے۔

اندر آئیں، آپ کو مکمل فہرست نظر آئے گی۔

پٹھے چلے جائیں گے، میں اسے لگانا چاہتا ہوں، تو ہم

یہ کلک کیا ہے

اس پر کلک کر کے آپ اس کی ویب سائٹ وزٹ کر سکتے ہیں۔

اگر آپ آزاد ہیں تو آپ اسے دیکھ سکتے ہیں۔

یہ واحد ہدف تھا جو میں حاصل کر سکتا تھا۔

میں نے ڈاؤن لوڈ پر کلک کیا اور میں یہی کہہ رہا ہوں۔

سر براہ کرم جوائن کریں، ویسے اس نے اسے بھی ڈاؤن لوڈ کیا ہے۔

ہم کر لیں گے تو سامنے آتے ہوئے دیکھیں گے۔

ہم جاتے ہیں تو ہمارے سامنے پس منظر میں یہی نظر آتا ہے۔

میں یہاں اپنے ڈیسک ٹاپ کو ترتیب دینے گیا ہوں۔

طریقہ نمبر ایک پہلا دائیں کلک ہے۔

دائیں کلک کرنے کے بعد آپ یہاں دیکھیں گے۔

ڈیسک ٹاپ بیک گراؤنڈ آپشن بطور سیٹ ہے۔

پس منظر: اس پر کلک کریں اور آپ وہاں دیکھیں گے۔

اگر آپ ڈیسک ٹاپ پر جائیں تو آپ کو وہ نظر آئے گا۔

پس منظر میں آپ دوسرے نمبر پر ہیں۔

جہاں سے آپ آئے ہیں وہاں سے تصاویر براؤز کریں۔

کر سکتے ہیں اور اسے بتا سکتے ہیں۔

فولڈر میں وہ تصاویر جو ہم شامل کرنا چاہتے ہیں۔

یہ ٹھیک ہے، آپ براؤز کر سکتے ہیں اور مقام دے سکتے ہیں۔

اگر یہ وہاں ہے تو وہی فولڈر انسٹال ہو جائے گا جیسا کہ یہ ہے۔

میں نے یہ دائیں کلک کا استعمال کرتے ہوئے کیا۔

کام ختم ہونے کے بعد اگلی چیز یہ ہوتی ہے۔

اگر ہمارے پاس ڈیسک ٹاپ ہے۔

اگر آپ تصویر پوسٹ نہیں کرتے ہیں تو آپ کو اس کی قیمت ادا کرنی ہوگی۔

تصویر کے بجائے آپ نے صرف رنگ کے ساتھ کام کیا۔

مجھے اسے لینا ہے، بہت سے لوگوں کو تصویر پسند نہیں ہے۔

اسے صرف رنگ استعمال کرنا ہے۔

تو کیا ہوتا ہے کہ آپ یہاں ہیں۔

دیکھیں میں نے تصویر کو ٹھوس رنگ میں ڈال دیا ہے۔

آئے گا تو چہرے کا رنگ جو آپ کے سامنے آئے گا۔

کسی پر کلک کریں اور آپ رنگ دیں گے۔

آپ ڈیسک ٹاپ پر جا سکتے ہیں اور ڈیسک ٹاپ پر جا سکتے ہیں۔

اگر رنگ ہو گیا ہے تو ہم یہاں چیک کرتے ہیں۔

kia نیا پس منظر والا بچہ اور نیا ٹھوس

رنگ

کوئی بھی رنگ لگا کر اور پھر ہم

سے پس منظر سیٹ

انٹرنیٹ وال پیپر ہمیں بھی ملا

دیکھیں یہ ٹھیک ہے تو اس کے علاوہ ہمارے پاس ٹھوس رنگ ہے۔

میں نے بھی اپلائی کیا اور آج کا لیکچر دیکھا۔

میں ہم نے اسٹارٹ مینو سے نیا دیکھا

پس منظر کا اطلاق کیسے کریں۔

اس کو اسکرین پر فٹ کرنے کے لیے کون سے ہیں؟

آپشن C یہ ہے کہ آپ یہ کر سکتے ہیں۔

فٹ کر سکتے ہیں بڑھا سکتے ہیں

اور اس کے بعد آپ انٹرنیٹ سے بیک گراؤنڈ ڈاؤن لوڈ کر سکتے ہیں۔

اسے ڈاؤن لوڈ اور انسٹال کرنے کا طریقہ اور

اگر آپ بیک گراؤنڈ سیٹ نہیں کرتے ہیں تو پھر ٹھوس

کلر مزید  ویڈیوز کو کیسے اپلائی کریں۔

Monday, May 27

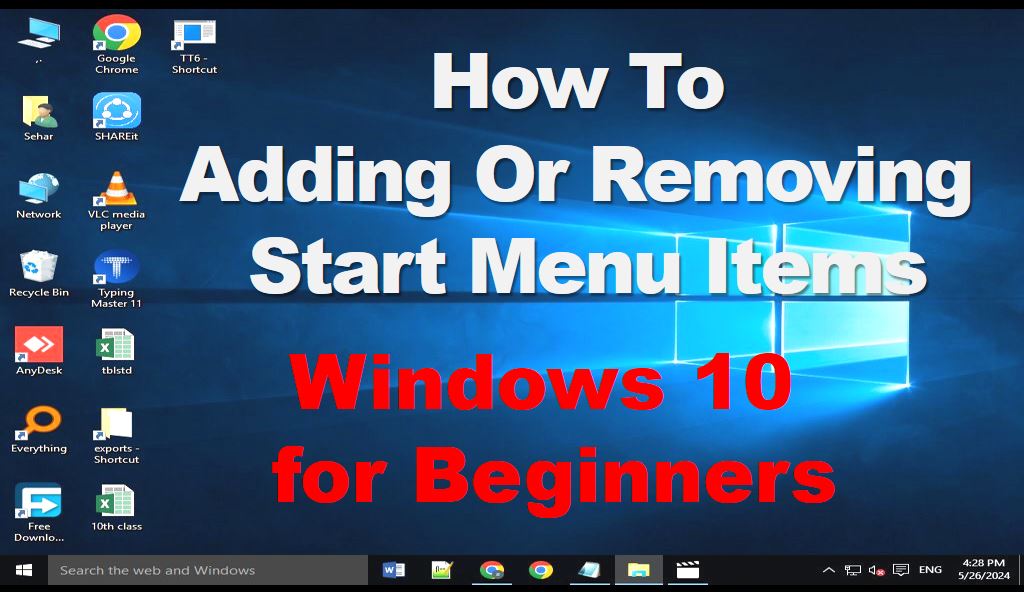
HOW TO ADDING OR REMOVING START MENU ITEMS | WINDOWS 10 BASICS

 HOW TO ADDING OR REMOVING START MENU ITEMS | WINDOWS 10 BASICS

https://youtu.be/sJz-f0NycSY

#EducationFUN, #windows, #tutorial, windows 10 for beginners, windows 11 tutorial for beginners in
hindi, windows 11 laptop for beginners, windows 10 tips and tricks for beginners,
windows 10 laptop for beginners,
how to use a computer windows 10 for beginners,
learn windows 10 for beginners,


 HOW TO ADDING OR REMOVING START MENU ITEMS | WINDOWS 10 BASICS


In this lecture we will discuss how

To add and remove Start menu items
The Start Menu as you know it in Windows 10.
It is centrally located here and
These are his items in front of you.
Now there seems to be some pinnacle here.
To do something and take it off is what we do.
The first thing I will see in front of you.
I run notepad plus.
Whatever the plus, I run it in front of you.
It's played here, now you click here.
If you do it recently here in notepad.
The one running empty is fine and the other one is this.
If it comes in highly recommended, do it.
All the items we opened.
It turns out, well, this is one of them.
Pretend it's VLC player, that's fine.
How did we embed it in the Start Menu?
What we have to do in this lecture is add and move
do actually these are the actual words that pin is used for.
What we have to do in this lecture is add and move
do actually these are the actual words that pin is used for.
So what is toxic in the start menu?
It could be the same pin, now it's Fox.
We have to add a page here, here's a way.
That I can click and take it there but this
If you can't find any other method, use it here.
done
Right click on it and you're here
The pin will come here Start the pin a bit.
Wait for a while then get up from there and come here.
OK, now click on it here.
Do this and get the pin when you get here.
Another way here is you can move it anywhere.
Can go anywhere.
Well one object inside another object
See if you leave it here, a folder can also be created.
Click on it and it will open afresh.
Maybe if we want to get it out of here.
You drag it apart.
OK, now I drag it here.
Click on the pin you want to red-pin.
From the beginning, this is the method I have shown you.
Told this thing is a recommended view.
Beyond that, by right-clicking, I told you
Here it is also possible.
For example, I have your desktop.
I have a Windows 10 desktop.
Here is the chrome I have right above it.
Pin to start here if I click.
If you can pin it too, yours
As many items as you want and you can start the menu.
You can pin inside Pin to here.
There is only one pin in the Start menu.
The second one here is the pin-to-taskbar.
It also happens here, see configuration, if I start
See this first pin in the taskbar
The PIN can also be found by clicking here.
Put it here and it will become an icon.
it was
This was your guide to adding and transferring.
Pin and unpin the Start menu.
So practice it with objects and
See where you can find any item in the Start menu.
How can you pin and unpin?
Check out the long list of apps here
On the Start menu, you can
Pin your favorite item by clicking red.
Start and if you come back, come back
You will see it, that is, if you see it again, you will
See what you've pinned here.
Available here in StartMenu.
We can pin in three places outside from inside.
And recommended it and here with
Just above the icons on the desktop
Start the process by clicking here.
Enter the pin item
Take it for less if you want.

pin and unpin are used here.

Click here and you will see here.

Stay tuned for educational information.


اس لیکچر میں ہم بات کریں گے کہ کیسے
اسٹارٹ مینو آئٹمز کو شامل کرنے اور ہٹانے کے لیے
اسٹارٹ مینو جیسا کہ آپ اسے ونڈوز1 ٠ میں جانتے ہیں۔
یہ یہاں مرکز میں واقع ہے اور
یہ اس کی اشیاء آپ کے سامنے ہیں۔
اب ایسا لگتا ہے کہ یہاں کچھ پن ہے۔
کچھ کرنا اور اتارنے کے لیے یہ ہم کرتے ہیں۔
پہلی چیز جو میں آپ کے سامنے دیکھوں گا۔
میں نوٹ پیڈ پلس چلاتا ہوں۔
جو بھی پلس ہے، میں اسے آپ کے سامنے چلاتا ہوں۔
یہ یہاں چلایا گیا ہے، اب آپ یہاں کلک کریں۔
اگر آپ اسے حال ہی میں یہاں نوٹ پیڈ میں کرتے ہیں۔
جو خالی چل رہا ہے وه ٹھیک ہے اور دوسرا یہ ہے۔
اگر یہ زیاده تجویز کرده میں آتا ہے تو اسے کریں۔
تمام اشیاء جو ہم نے کھولیں۔
یہ کھل گیا، ٹھیک ہے، یہ ان میں سے ایک ہے۔
دکھاوا کریں کہ یہ VLC پلیئر ہے، یہ ٹھیک ہے۔
ہم نے اسے اسٹارٹ مینیو میں کیسے سرایت کیا؟
اس لیکچر میں ہمیں جو کرنا ہے وه ہے ایڈ اینڈ موو
doاصل میں یہ اصل الفاظ ہیں جو پن کا استعمال کیا جاتا ہے۔
pinاور unpin یہاں استعمال ہوتے ہیں۔
تو سٹارٹ مینیو میں زہریلا کیا ہے؟
یہ وہی پن ہو سکتا ہے، اب یہ فاکس ہے۔
ہمیں یہاں صفحہ شامل کرنا ہے، ایک طریقہ یہ ہے۔
کہ میں کلک کر کے وہاں لے جا سکتا ہوں لیکن یہ
پن یہاں آئے گا پن کو تھوڑا سا شروع کریں۔
تھوڑی دیر انتظار کرو تو وہاں سے اٹھ کر یہاں آجاؤ۔
ٹھیک ہے، اب اس پر یہاں کلک کریں۔
یہ کرو اور جب تم یہاں پہنچو تو پن لے لو۔
دوسرا راستہ یہاں آپ اسے کہیں بھی منتقل کر سکتے ہیں۔
کہیں بھی جا سکتے ہیں۔
ٹھیک ہے ایک شے دوسری شے کے اندر
دیکھیں اگر آپ اسے یہاں چھوڑ دیں تو ایک فولڈر بھی بن سکتا ہے۔
اس پر کلک کریں اور یہ نئے سرے سے کھل جائے گا۔
شاید اگر ہم اسے یہاں سے نکالنا چاہتے ہیں۔
آپ اسے الگ سے گھسیٹیں۔
ٹھیک ہے، اب میں اسے یہاں گھسیٹتا ہوں۔
ریڈ پن کرنا چاہتے ہیں ان پن پر کلک کریں۔
شروع سے، یہ وہی طریقہ ہے جو میں نے آپ کو دکھایا ہے۔
اس چیز کو بتایا جو تجویز کرده نظاره ہے۔
اس سے آگے، دائیں کلک کرکے، میں نے آپ کو بتایا
یہاں یہ بھی ممکن ہے۔
مثال کے طور پر، میرے پاس آپ کا ڈیسک ٹاپ ہے۔
میرے پاس ونڈوز 1٠ ڈیسک ٹاپ ہے۔
یہ ہے وه کروم جو میں اس کے بالکل اوپر ہوں۔
اگر میں کلک کرتا ہوں تو یہاں شروع کرنے کے لیے پن کرتا ہوں۔
یہاں کلک کریں اور آپ یہاں دیکھیں گے۔
اگر آپ اسے بھی پن کرسکتے ہیں تو آپ کا
جتنی اشیاء آپ چاہیں اور آپ مینو شروع کر سکتے ہیں۔
آپ یہاں پن ٹو کے اندر پن کر سکتے ہیں۔
اسٹارٹ مینو میں صرف ایک پن ہے۔
دوسرا یہاں پن ٹو ٹاسک بار ہے۔
اسے یہاں دیں اور یہ ایک آئیکن بن جائے گا۔
یہ تھا
یہ آپ کے شامل کرنے اور منتقل کرنے کے لئے رہنما تھا۔
اسٹارٹ مینو کو پن اور ان پن کریں۔
لہذا اشیاء کے ساتھ اس کی مشق کریں اور
دیکھیں کہ اسٹارٹ مینو میں آپ کو کوئی بھی آئٹم کہاں مل سکتا ہے۔
آپ پن اور ان پن کیسے کرسکتے ہیں؟
ایپس کی لمبی فہرست یہاں دیکھیں
اسٹارٹ مینو پر، آپ کر سکتے ہیں۔
سرخ پر کلک کرکے اپنی پسندیده چیز پر پن کریں۔
شروع کرو اور اگر واپس آؤ تو واپس آؤ
آپ اسے دیکھیں گے یعنی اگر آپ اسے دوباره دیکھیں گے تو آپ
دیکھیں گے کہ آپ نے یہاں کیا پن کیا ہے۔
یہاں اسٹارٹ مین میں دستیاب ہے۔
ہم تین جگہوں یعنی اندر سے پن کر سکتے ہیں۔
اور اس کی سفارش کی اور یہاں کے ساتھ
ڈیسک ٹاپ پر شبیہیں کے بالکل اوپر
یہاں کلک کرکے عمل شروع کریں۔
پن آئٹم میں آئیں
اگر آپ چاہتے ہیں تو اسے کم میں لے لو۔